How to Raspberry Pi Media Server Easy
Originally published by Aug 8, 2019
Table of Contents
- Introduction
- Overview
- Required Components
- Guide to Setting Up Raspberry Pi as a Home Media Server
- Setting Up SD Card
- Booting Raspberry Pi
- Installation of Kodi Media Center
- Configuration of Kodi as a Media Server
- Video/Music Playback on Wi-Fi Devices
- Related Articles
Introduction
If you have a lot of movies, music, TV shows, and other video and audio files on your hard drive, why not make it available for every device at home, for yourself and other family members. If you want to have a Netflix-esque experience using your collection of movies, then a home media server is your best bet. What exactly is a media server? A media server refers to a specialized device with connected storage containing the media files (videos, music, etc.) that are required to stream to any remote client that can access it. The terminology "home media server" refers to a kind of system in which a media server is installed in the home and its access is available locally on all devices having access to the local area network.
Most homes have a Wi-Fi router, so when the media server is configured with the router, then all devices connected to the network can access the media available on a home media server. Windows 7 and later have a built-in media-streaming server. All DLNA-compatible devices can access such Windows-based machines on the network to stream videos and music remotely. However, you surely don't want to employ a large piece of hardware for one application. This guide will teach you how to configure a cheap and low power media server using a third-party media server application. Various software applications are available for this purpose, such as Plex and Kodi. Here, we'll use Kodi due to its user-friendly interface, easy configuration, and availability on all types of devices (Windows, Android, Linux, iOS, etc.).

Overview
In this DIY project, we'll develop a home media server using a popular small-scale computing device known as Raspberry Pi. This device has all the capabilities of a computer, and it can be interfaced easily with the home network. Moreover, it provides an easy input interface for keyboard and mouse, as it comes with four USB ports. The remaining USB ports can be used to connect the storage device containing your media files. We'll sequence this tutorial as follows:
-
-
- Setting up SD card
- Booting Raspberry Pi
- Installation of Kodi media center
- Configuration of Kodi as a media server
- Video/Music playback on Wi-Fi devices
-
Required Components
| Component | Link/Picture | |
| Raspberry Pi 3 Model B+ | https://www.newark.com/raspberry-pi/rpi3-modbp/sbc-arm-cortex-a53-1gb-sdram/dp/49AC7637 | |
| Any USB Keyboard |  | |
| USB Mouse |  | |
| High-speed HDMI Cable |  | |
| HDMI-compatible display |  | |
| Wi-Fi Router |  | |
| 16GB microSD Card |  | |
| SD Card Adapter |  | |
| 1TB External Hard Drive |  | |
| USB to Micro USB cable |  | |
| 5V 2A Power Adapter |  | |

Guide to Setting Up Raspberry Pi as a Home Media Server
Setting Up SD Card
The first step is setting up your microSD card. Raspberry Pi doesn't have a built-in OS; it has a microSD slot. To boot up Raspberry Pi, you need to install a Raspberry Pi-compatible OS to the SD card using your laptop. Once your SD card is configured, insert it into the SD card slot in the Raspberry Pi board and boot it up using a power adapter. Here's how to set up the SD card:
-
-
- Download Raspbian operating system for Pi from https://www.raspberrypi.org/downloads/
-

-
-
- Download the version of Raspbian OS shown below
-

-
-
- Once the zip file has downloaded, extract the file contents. You'll have an image file ready to be written to SD card
- Now, put the SD card in the SD card adapter and insert it into your laptop
- Download the SD card formatter for Windows from https://www.sdcard.org/downloads/formatter/index.html
- Once the download is complete, install the application and format the SD card
-

-
-
- Download Disc Imager from https://sourceforge.net/projects/win32diskimager/
- Run the tool and select your SD card and the Raspbian OS image you downloaded before
-

-
-
- Press "Write" after selecting the image file and SD card. Once the SD card writing is complete, your SD card is ready to be installed in the Raspberry Pi board
-
Booting Raspberry Pi
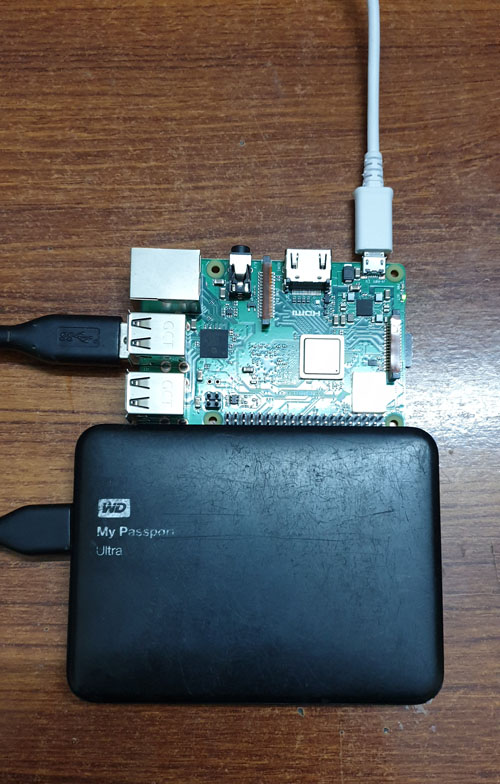
Be cautious about using Raspberry Pi 3 or later models. Older versions don't have Wi-Fi, requiring the use of an Ethernet cable with the router. At this stage, you're ready to boot up Raspberry Pi for the first time. The layout of a Raspberry Pi board is as shown:

Procedure for booting up:
-
-
- Connect the USB devices: keyboard, mouse, external hard drive
- Connect the monitor port with the HDMI display using a cable
- Insert the microSD card into your Pi board
-

-
-
- Now, connect the power adapter with the card using a USB to micro USB cable; Raspberry Pi will start as soon as it gets power and detects an SD card with OS
- Display of Raspberry Pi will be available on HDMI display
- Upon first boot, Raspberry Pi will ask for various preferences; for help, refer to the official website
-
Installation of Kodi Media Center
The final part of the process is the installation and configuration of the KODI media server. Before you start this installation, Raspberry Pi needs to be connected to the internet. Your Wi-Fi router should have an internet connection to continue the process. The step-by-step procedure is as follows:
-
-
- Once you're connected to the internet, open the terminal window on the Raspberry Pi home screen
-

-
-
- Type the following command: sudo apt-get install kodi; this will start the download and installation process of Kodi media center
- After the command, type "Y" and press enter
- Once installation of Kodi is complete, type the following command: sudo nano /etc/default/kodi; this will open a setting window where you have to enable the system to start Kodi upon startup directly (change the enable setting to 1 by entering the following command in the opened window: ENABLED=1)
- Press Ctrl+Z to exit, saving the changes
- To run manually, use the following command in the terminal window: kodi
-
Configuration of Kodi as a Media Server
-
-
- Launch the Kodi media center and click the Settings icon:
-

-
-
- Click the Service settings
-

-
-
- Now, turn on sharing over UPnP by toggling the features as shown below:
-

Kodi has now been configured as a media server; it'll broadcast its libraries to any DLNA-supported device on the network. To add libraries, go to the videos, music, etc. tabs on the home screen and define the locations on your connected storage drive.
You're now ready to play back any video from a defined library on any device in your home network!
Video/Music Playback on Wi-Fi Devices
To play a video from your Raspberry Pi media server, you have the following option, among others:
-
-
- Install Kodi on your device
- Use VLC Media Player for playback
-
Kodi is available for all the platforms listed here.
-
-
- Download Kodi for the relevant platform
- Once downloaded and the installation is complete, apply the same configuration as your media server, i.e., enable UPnP/DLNA
-
Now, follow the steps shown in the following images:


Press OK in the above window, and your device will have the same libraries as shared by your Raspberry Pi.
Open VLC Media Player and go to Universal Plug and Play (UPnP). The Kodi server you configured for Raspberry Pi will appear in the windows if you're on the same Wi-Fi network. There, you can access the files you added to the library.

Related Articles
Are you interested in learning more about Raspberry Pi projects that you can complete at home? Check out the following articles:
- The History and Uses of Raspberry Pi!
- Building a Wavetable Synthesizer with a Raspberry Pi and an Arduino Uno
- Get better sound from your Raspberry Pi by replacing its analogue audio output
image attribution: fizkes – stock.adobe.com
Check us out on Social Media
Source: https://www.deviceplus.com/raspberry-pi/setting-up-raspberry-pi-as-a-home-media-server/
0 Response to "How to Raspberry Pi Media Server Easy"
Post a Comment